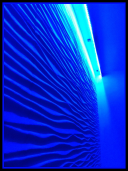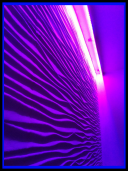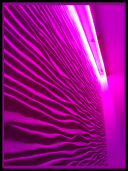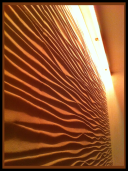
RGB CV CONTROLLER
RGB CV Control Device and Pictures and Connection Diagram.
Click to picture for see biggest photos
Click to picture for see biggest photos
RGB CONTROLLER PRODUCTS :
RGB CV Controller Pictures
Connection Diagram
Samples
For Buy
Choose your Favourite product and contact with us by our mail
RGB CV2 and RGB CV3 SERIES CONTROLLERS DETAILS
This 2 device is a RGB LED Lighting control system as well as it is a speed controller of DC motors by its 3 ports. In fact, the system is a PWM controller that commands three ports simultaneously.
We didnt manufacture that old RGB CV1 version... But we manufactureing new version of this device. they are RGB CV2 and RGB CV3. that new 2 vercion RGB CV2 and RGB CV3 Series difference is only inside of 10. and 11. programs... That difference details teling under the Program 10 and Program 11
What is the RGB ?
RGB refers to the three colour names in English language: Red , Green and Blue . By the use of these three colours we can produce all the other colour ranges.
What doing RGB CV
Sample Videos
watch videos for see what doing RGB CV Series Controllers
THE PROPERTIES OF THE DEVICE:
• Our device can obtain any colour by mixing the different combination of the three main colours and can softly or sharply pass among the colours with respect to time. • By the use of our product, you would never face the frequent problem of light flickering which you may have faced with other similar products.
• Besides, the speed adjustment and the passage to the single tone colours are about 256 levels. This means that the difference between the fastest and the slowest are 256 different speed choices.
• At the same time, you can choose the composition of three different colours as 256 different values. This means that you can adjust brightness for each colour. By this way you would be able to get the wanted colour values and tones.
• You would find the default specifications, when you first turn on our product. After that, you can choose and save the wanted colour adjustment to a program. The saved values don’t get affected by the electric cut off.
• Unlike the similar products which make you obliged to re-enter the wanted values after electric cut-offs or sudden voltage changes, you would never live such troubles with our product. It would go on working by the use of last saved adjustment.
• Also it is possible to get back the default specifications easily.
• The small shape of our product can fit to any place.
• You can amplify the output according to your power need by using our amplifiers. You can even decoratively illuminate a big building by using amplifiers at certain led strip lengths.
• This device has 11 programs according to the different needs. It has 8 speed programs to regulate & pause at any level of colour.
• This device can work between 6 and 30 volts. Each output port supplies 60 watts. The summation of all the ports is about 180 watts.
• As well as it is possible to control various light emitting component by means of wide voltage range of our product, by usage of our other products the voltage that meets with your needs can be obtained and you can run lots of AC or DC light components or motors.
• This product can run 3 different motors at the wanted speeds and in the orders. It is possible to run them progressively and smoothly either from slow to the fast or from fast to the slow speeds.
THE INSTRUCTIONS FOR USE
AN IMPORTANT NOTIFICATION ABOUT BUTTONS ON THE DEVICE :
We used the button names B1, B2, B3 & B4 hence one button has functions more than one. The buttons take different functions depending on the program.
THE MAIN PROGRAM MENU
The program starts by the default specifications preset by the factory. Flashing display indicates that you are in main menu. B1 and B2 buttons makes you go forward or backward to see the different preset programs. In order to enter any program press B3. Static display shows that you entered the program. In order to come back to the main program menu, you should press B4 button. This button saves and exits the proceeded program.
PROGRAM 1
It is the first program you would meet after running your system. In this program, you would see the default of RGB light tones. You can display the 3 letters “r”, “g” or “b” by pressing on B3 to select the following colours: “Red”, “Green” or “Blue”. After choosing the colour, you can press B1 to increase the colour tone or B2 to decrease it.
There are 256 gradations for every colour. You can choose the value and the tone of wanted colour. To save the chosen colour, you should press B4 button which makes you Save & Exit the proceeded program. When entering it again you could go on the saved values. If you would face the problem of electricity cut off without saving, you wouldn’t find the system in the left position after coming back. Hence you must press B4 to save.
PROGRAM 2
This program makes passes softly between colours. It is possible to see the progressed colours by order. To increase the progression speed, you should press B1 button. To decrease the progression speed, you should press B2.
After choosing the progression speed of colours, you should press B4 (to Save &Exit) so that you can get back the chosen values. After that the electricity cut off will never make you set the values again.
If you want to stop the colour progression, you should use B3. You would see the letter “p” means pause. By decreasing the speed of colour progression, you can stop easily at any wanted colour.
PROGRAM 3
In this program, you would find the main colours (red, green & blue) progressing in a flashlight way. You could choose the progression speed by the use of B1 to increase it and B2 to slow down. By pressing B3, you would stop the progression and you would see the letter “p” displayed. By pressing B4, you would save the chosen values and exit the program.
PROGRAM 4
In this program, 7 colours (Red, Purple, Blue, Turquoise, Green, Yellow & White) would lighten progressively in a sudden way without turning off when passing from one colour to another. You could choose the progression speed by the use of B1 to increase it and B2 to slow down. By pressing B3, you would stop the progression and you would see the letter “p” displayed. By pressing B4, you would save the chosen values and exit the program.
PROGRAM 5
This program is the same with the Program 4 but, the only difference is that the 7 colour lights turn off when passing from one colour to another (flashing manner).
PROGRAM 6
In this program, three intermediate colours (Purple, Yellow and Turquoise) pass progressively. There is no flashing when passing from one colour to another. Functions of buttons are alike with the former program.
PROGRAM 7
In this program, the 3 main colours (Red, Green, and Blue) pass progressively. It is like the Program 3 but without flashing. The use of buttons is the same with the Program 3.
PROGRAM 8
In this program, the levels of 7 different colours from 0 to 256 are seen. The passes of colours are smooth and in the order of: Red, Green, Blue, Yellow, Turquoise, Purple and White. Every colour level smoothly goes from 0 to 256 and turns back to 0.
Progression speed can be adjusted by the use of B1 to increase it and B2 to slow down. By pressing B3, you would stop the progression. By pressing B4, you would turn back to the main program menu.
PROGRAM 9
In this program also, 7 different colours passes in order. But every colour first lights in the level of 256 and then slowly goes to the zero level. The light would turn off every time before passing to the following colour. That means that the values would start from the highest one before fading and softening till turning off.
As the other programs, you could choose the progression speed by the use of B1 to increase it and B2 to slow down. By pressing B3, you would stop the progression. By pressing B4, you would exit to the main program menu.
PROGRAM 10
for RGB CV2 : This program is rich in terms of colour transition. The main difference between this program and the second program is that there isn’t a turning off the light after the red colour. It means there isn’t any darkness while creating light spectrum. B1 & B2 are used to obtain the wanted progression speed. By pressing B3, you would pause the progression. By pressing B4, you would save and exit to the main program menu.
for RGB CV3 : The main difference of this program is the waiting for the 3 main colours to make them clear. B1 & B2 are used to obtain the wanted progression speed. By pressing B3, you would pause the progression. By pressing B4, you would save and exit to the main program menu.
PROGRAM 11
for RGB CV2 : The main characteristic of this program is the sharp display of 3 main & 3 intermediate colours after soft passage of RGB colours. B1 & B2 are used to obtain the wanted progression speed. By pressing B3, you would pause the progression. By pressing B4, you would save and exit to the main program menu.
for RGB CV3 : This program is like the program 10 but, the only difference is the waiting for 7 colours (3 main colours, 3 intermediate colours and white) during the transition of the whole colour spectrum. This shows those 7 colours clearly. B1 & B2 are used to obtain the wanted progression speed. By pressing B3, you would pause the progression. By pressing B4, you would save and exit to the main program menu.
PROGRAM 0
This program enables you to set back to the default specifications. After entering this program, by pressing the button B3 the default specifications would be set back again. You would see the letter “C” displayed (Clear) after pressing B3. Press B4 to come back to the main program menu.


